引言:当单片机遇上音乐
你是否想过,用一颗只有64KB Flash的廉价单片机(如PY32F030)就能播放复杂的MIDI音乐?传统嵌入式音频开发往往需要高性能芯片,但通过Rust语言的高效和现代嵌入式生态,我们可以在资源受限的设备上实现比较满意的的音乐效果。
本文将带你探索:
- MIDI协议的解析工具
- 如何用Rust为ARM Cortex-M0单片机的定时器外设开发音频蜂鸣器程序
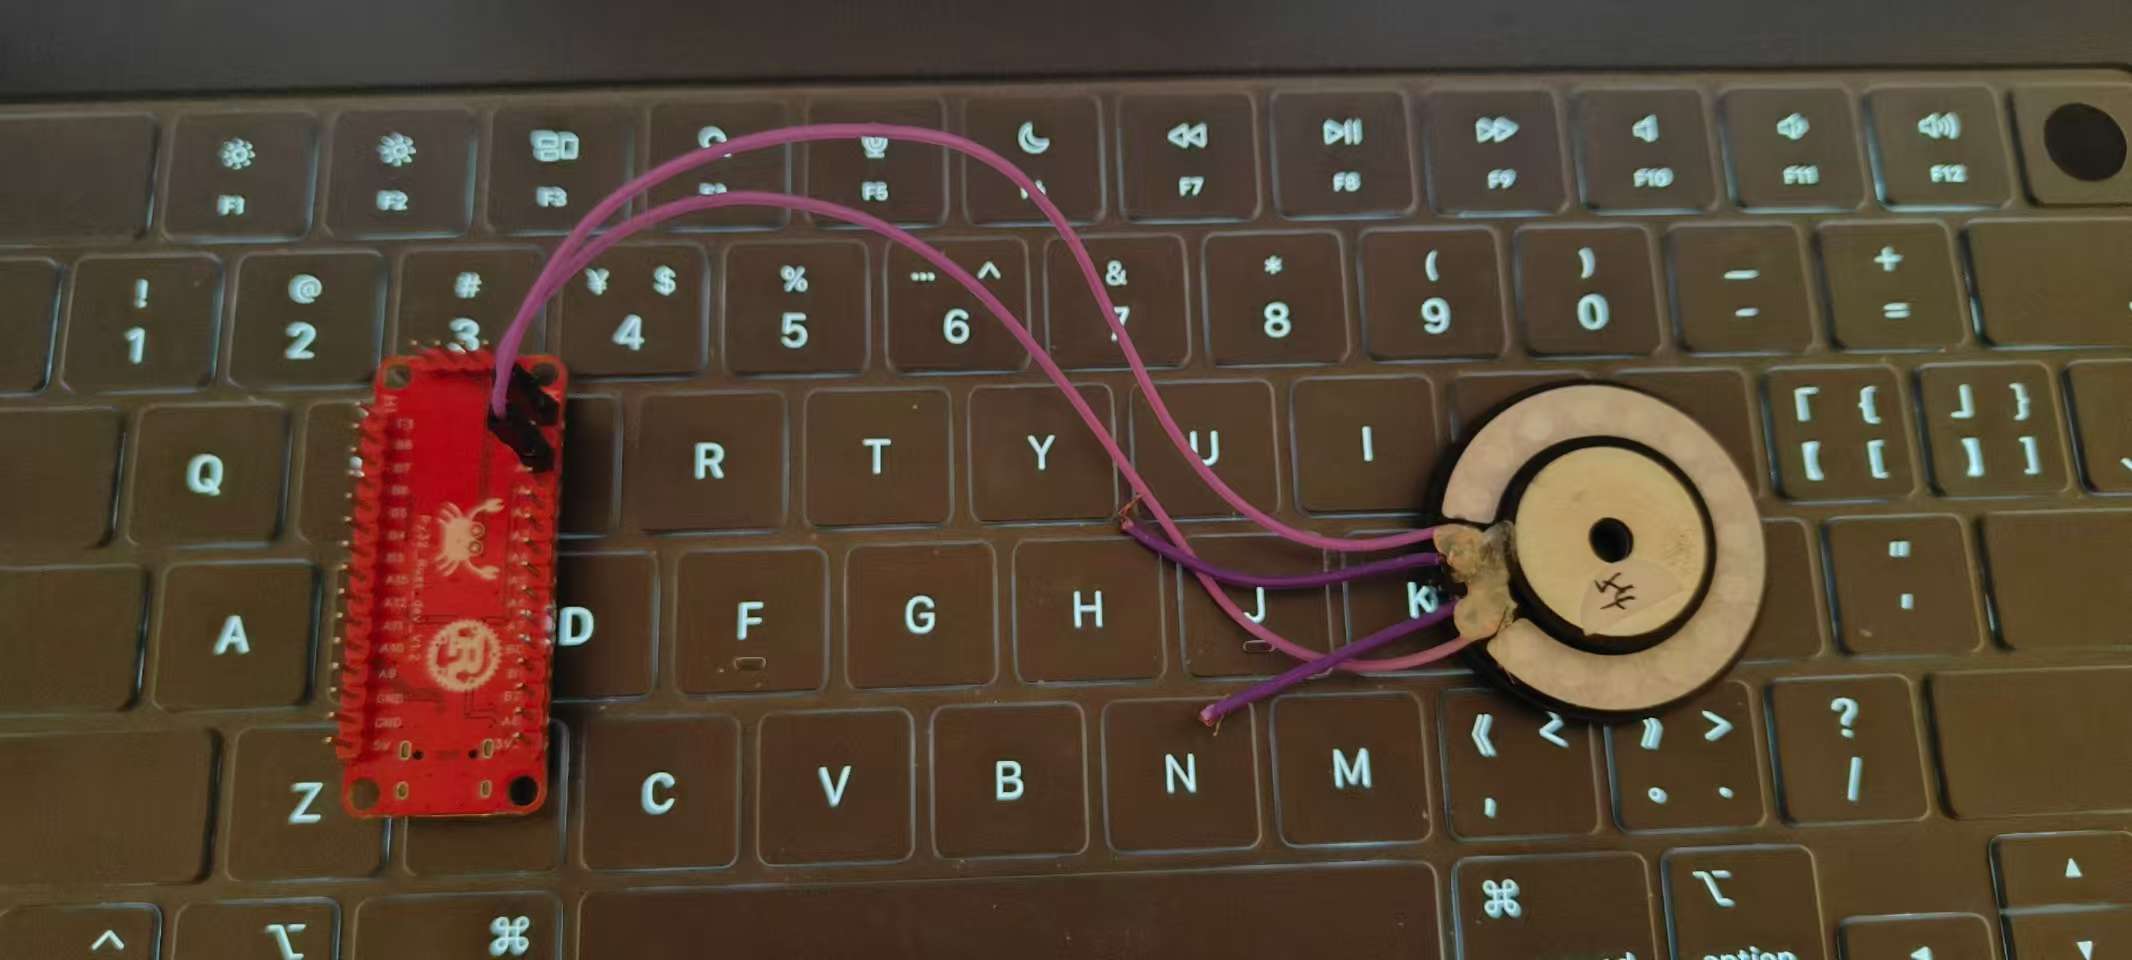
硬件准备:简约而不简单
核心器件:
- PY32_Rust_Dev Board:Py32f030主控,ARM Cortex-M0内核,主频48MHz,64KB Flash/8KB RAM
- 有源蜂鸣器(或无源蜂鸣器+驱动电路或其他喇叭)
硬件连接:
- 使用蜂鸣器的两端连接GND和PA0或PA3。
- 使用USB或SWD口供电
软件设计
- Midi转换工具
由于单片机资源有限,因此需要先将Midi文件解析为直接用于控制频率和延时,因此开发了一个小工具用于转换。部分代码如下:
#![allow(unused)]
fn main() {
for track in &tracks {
    match track {
        Track::Midi(midi) => {
            for m in midi {
                let event = &m.event;
                let tick_ms: u16 = (m.delta_time as f32 * one_tick_ms) as u16;
                println!("track event: {:?}", m);
                match event {
                    MidiMsg::Meta { msg } => match *msg {
                        Meta::SetTempo(tempo) => {
                            let bpm_ms = tempo as f32 / 1000.0;
                            one_tick_ms = bpm_ms / tpqn as f32;
                            println!("tempo: {} bpm, one tick ms: {}", bpm_ms, one_tick_ms);
                        }
                        _ => {}
                    },
                    MidiMsg::ChannelVoice { channel, msg } => match *msg {
                        ChannelVoiceMsg::NoteOn { note, velocity } => {
                            note_list.push(if velocity == 0 {
                                Note::new(*channel as u8, 0, tick_ms)
                            } else {
                                Note::new(*channel as u8, note, tick_ms)
                            });
                        }
                        ChannelVoiceMsg::NoteOff {
                            note: _,
                            velocity: _,
                        } => {
                            // 关闭声音时,需要将note设置为0,否则会一直播放
                            note_list.push(Note::new(*channel as u8, 1, tick_ms));
                        }

                        _ => {
                            continue;
                        }
                    },
                    _ => {}
                }
            }
        }
        Track::AlienChunk(alien_chunk) => {
            for a in alien_chunk {
                println!("alien chunk: {}", a);
            }
        }
    }
}
}
可使用命令直接安装在Cargo中。
cargo install --git https://github.com/hysonglet/midi2rust.git
使用方式如下:
midi2rust ~/Downloads/PLACE.MID place
执行后将会生成rust数组如下:
#![allow(unused)]
fn main() {
struct Note {
    channel: u8,
    note: u8,
    delay: u16,
}

pub const MIDI_CONTENT: [Note; 5898] = [
    Note {
        channel: 0,
        note: 60,
        delay: 24705,
    },
    Note {
        channel: 0,
        note: 0,
        delay: 192,
    },
    ...
    Note {
        channel: 9,
        note: 0,
        delay: 3,
    },
];

}
- 单片机播放MIDI音乐
单片机只需要遍历音频数组,执行播放指定的频率和延时即可,代码如下:
#![no_std]
#![no_main]

use core::u16;

use hal::gpio::{Af, PinIoType, Speed};
// use hal::timer::advanced_timer::TimerChannel1Pin;
use hal::timer::advanced_timer::{AnyTimer, ChannelConfig, ChannelOutputConfig};
use py32f030_hal::gpio::gpioa::PA0;
use py32f030_hal::gpio::PinAF;
use py32f030_hal::{self as hal, mode::Blocking, timer::advanced_timer::Channel};

use embassy_executor::Spawner;
use embassy_time::Timer;
// use hal::mcu::peripherals::TIM1;
use embedded_hal_027::Pwm;

use defmt::info;
use {defmt_rtt as _, panic_probe as _};

#[embassy_executor::main]
async fn main(_spawner: Spawner) {
    info!("time1 start...");
    let p = hal::init(Default::default());
    let gpioa = p.GPIOA.split();

    let timer: AnyTimer<_, Blocking> = AnyTimer::new(p.TIM1).unwrap();
    let mut pwm = timer.as_pwm();

    pwm.set_channel_1_pin::<_, _>(Some(gpioa.PA3), Some(gpioa.PA0));

    // 配置定时器
    pwm.config(
        /* 配置通道1 */
        Some(ChannelConfig::default().ch(ChannelOutputConfig::default())),
        None,
        None,
        None,
    );

    // 计数频率为1M
    pwm.set_frequency(1_000_000);
    pwm.set_duty(Channel::CH1, 50);
    // 设置计数周期为1000,则波形的频率为 1000_000/1000 = 1K
    // pwm.set_period(1000u16 - 1);
    // let max_duty = pwm.get_max_duty();
    // // 33%的占空比
    // pwm.set_duty(Channel::CH1, max_duty / 3);
    // 使能通道
    pwm.enable(Channel::CH1);
    // 开始计数器
    pwm.start();

    loop {
        for note in &MIDI_CONTENT {
            let delay = note.delay;
            let channel = note.channel;
            let note = note.note as u32;
            // 只播放指定的 通道
            if channel == 0 {
                let period = (1000_000.0 / NOTE_FREQ[note as usize] - 1.0) as u16;

                info!("freq: {}, note: {}, delay: {}", period, note, delay);

                Timer::after_millis((delay) as u64).await;
                pwm.set_period(period);
            }
        }
    }
}

const NOTE_FREQ: [f32; 128] = [
    // 8.18, /* 0 */
    0.05, /* 0 */
    8.66, 9.18, 9.72, 10.3, 10.91, 11.56, 12.25, 12.98, 13.75, 14.57, /* 1~10 */
    15.43, 16.35, 17.32, 18.35, 19.45, 20.6, 21.83, 23.12, 24.5, 25.96, 27.5, /* 11~21 */
    29.14, 30.87, 32.7, 34.65, 36.71, 38.89, 41.2, 43.65, 46.25, 49.0, 51.91, /* 22~32 */
    55.0, 58.27, 61.74, 65.41, 69.3, 73.42, 77.78, 82.41, 87.31, 92.5, 48.99, /* 33~43 */
    51.91, 55.00, 58.27, 61.74, 65.41, 69.30, 73.42, 77.78, 82.41, 87.31, 92.5, /* 44~54 */
    98.0, 103.8, 110.0, 116.5, 123.5, 130.8, 138.6, 146.8, 155.6, 164.8, 174.6, /* 55~65 */
    185.0, 196.0, 207.7, 220.0, 233.1, 246.9, 261.6, 277.2, 293.7, 311.1, 329.6, /* 66~76 */
    349.2, 370.0, 392.0, 415.3, 440.0, 466.2, 493.9, 523.3, 554.4, /* 77~85 */
    1174.66, 1244.51, 1318.51, 1396.91, 1479.98, 1567.98, 1661.22, 1760.0, 1864.66,
    1975.53, /* 86~95 */
    2093.0, 2217.46, 2349.32, 2489.02, 2637.02, 2793.83, 2959.96, 3135.96, 3322.44,
    3520.0, /* 96~105 */
    3729.31, 3951.07, 4186.01, 4434.92, 4698.64, 4978.03, 5274.04, 5587.65, 5919.91,
    6271.93, /* 106~115 */
    6644.88, 7040.0, 7458.62, 7902.13, 8372.02, 8869.84, 9397.27, 9956.06, 10548.08,
    11175.3, /* 116~125 */
    11839.82, 12543.85, /* 126~127 */
];

struct Note {
    channel: u8,
    note: u8,
    delay: u16,
}

const MIDI_CONTENT: [Note; 896] = [
    Note {
        channel: 0,
        note: 71,
        delay: 26,
    },
    Note {
        channel: 0,
        note: 0,
        delay: 465,
    },
    ...
    Note {
        channel: 0,
        note: 0,
        delay: 0,
    },
];
实验
如果下载了库py32f030-hal,执行以下命令即可用usb串口或stlink或jlink下载并运行:
# 使用jlink或stlink下载
cargo r --example embassy_pwm_midi

# 使用USB串口下载
# 生成bin文件
cargo objcopy --example  embassy_pwm_midi -- -O binary embassy_pwm_midi.bin
# 串口下载
pyisp -s tty.usbserial-1140 -g -f embassy_pwm_midi.bin
固件大小为:
# Debug 编译
text    data     bss     dec     hex filename
22336      72    5752   28160    6e00 embassy_pwm_midi

# Release 编译
text    data     bss     dec     hex filename
19504      72    5752   25328    62f0 embassy_pwm_midi
快去写个低成本的生日祝福的歌曲吧
结语
使用这个小demo,音质和效果虽然有很多待改善的地方,但是仍然非常有趣,相比使用Arduno或C/C++去实现相同的功能,Rust的更加简洁,在这个小尝试中,我们可以感受到:
- Rust的零成本抽象在资源受限设备上的优势
- 现代嵌入式开发可以兼顾性能和开发效率
- 即使0.5美元的MCU也能实现复杂音频功能
附录
完整代码已开源([GitHub链接]),欢迎继续优化!
- midi2rust:https://github.com/hysonglet/midi2rust
- py32f030-hal: https://github.com/hysonglet/py32f030-hal
- midi音乐库:https://www.aigei.com/music/midi/
- midi频率表:https://newt.phys.unsw.edu.au/jw/notes.html